CollabSpace User Guide
See the buttons below for walkthroughs on various CollabSpace topics.
Alternatively, a PDF of the entire walkthrough (for printing/convenience) is available here: CollabSpace User Guide.
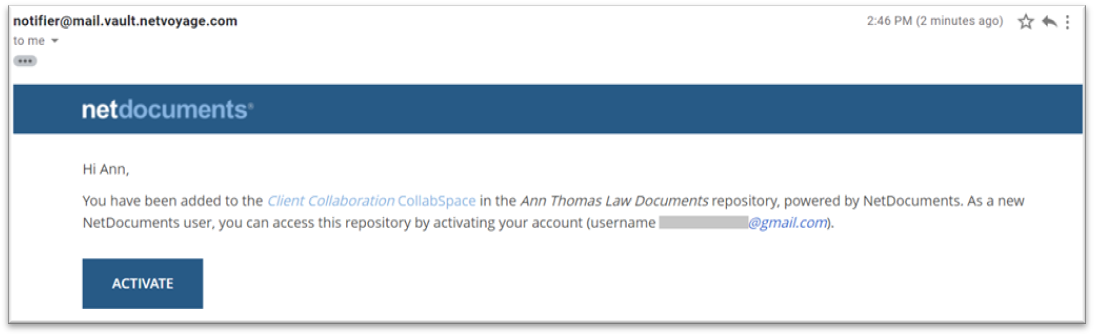
You will receive an email containing your username (same as your email address) and a link to activate your account. This will come from a different email address, so please be sure to check your inbox.If you do not receive an email similar to the one pictured below, please make your legal team aware.
Clicking the ‘Activate’ link will take you to the login page in your browser.
The first time you log in to a CollabSpace, you will be prompted to create a password. You will use your Username and Password to login to any additional CollabSpaces that you receive.
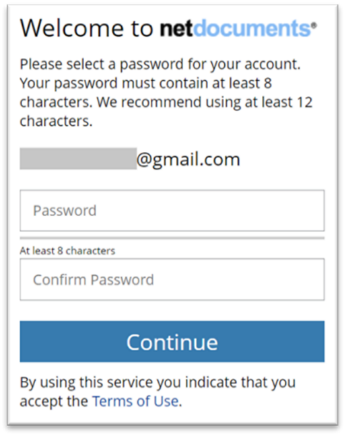
Once you have confirmed your password, click continue.
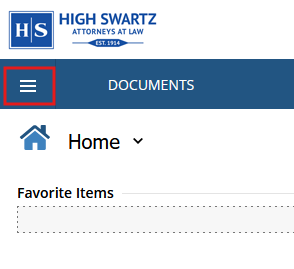
Upon signing in, if your CollabSpace is not immediately visible, try clicking the ‘Navigation pane’ (see red square pictured below). From there, look under the ‘Clients’ cabinet.
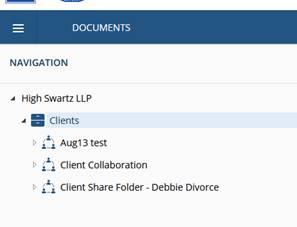
If you are part of multiple CollabSpaces, the Navigation pane will show all the CollabSpaces you belong to.You can quickly switch between CollabSpaces using this menu.
If documents are shared with you, the CollabSpace will contain a list of the documents you have been given permission to view by your legal team.
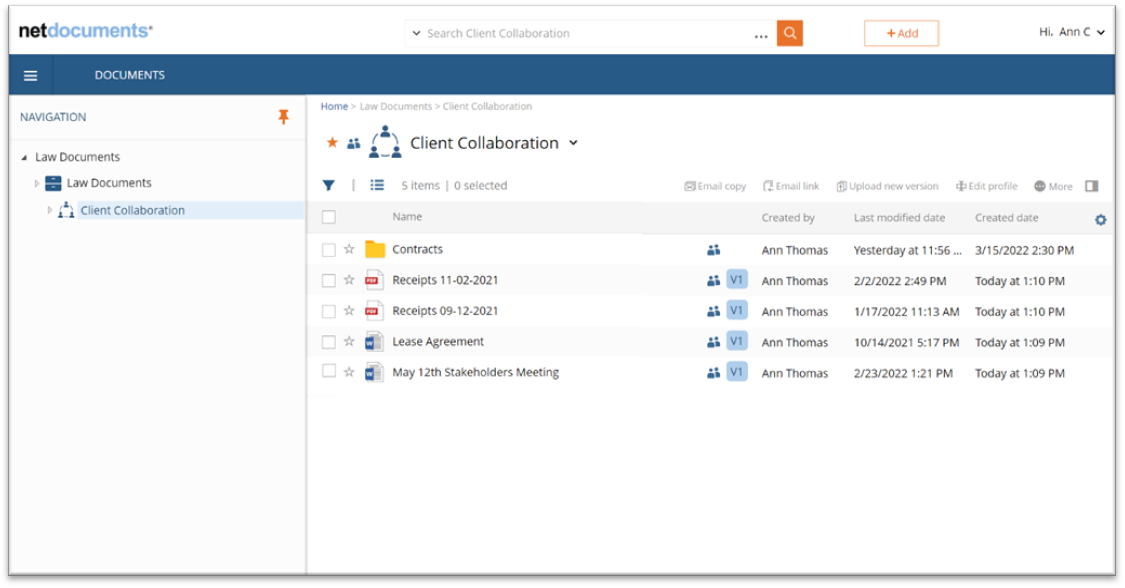
If the CollabSpace you have been added to has yellow folder icons, clicking on the folder icon will take you inside that folder, similar to a Windows or Mac folder tree.
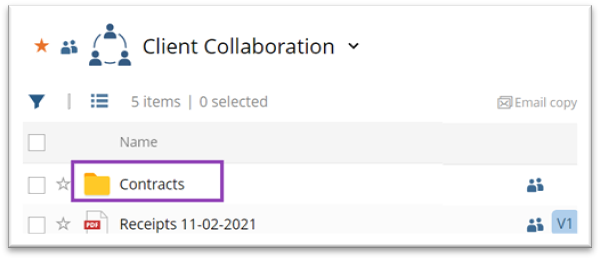
The simplest way to view a document is by right-clicking on the document name. From the dropdown menu that appears, select the View in browser option.
This will open the document in a new window in your web browser.
Some items may not be able to be previewed, in which they will need to be downloaded to view their contents (see the next section, Downloading Documents).
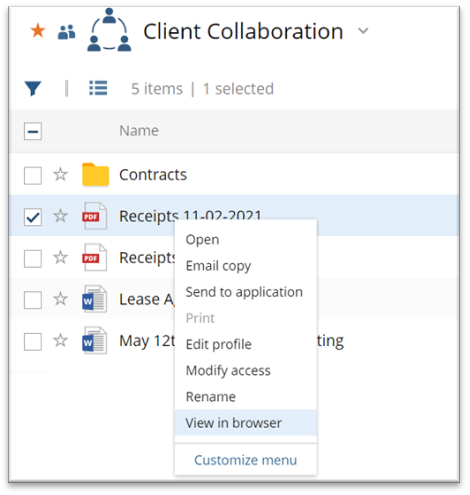
If you would like to download a document in a CollabSpace, click the check box to the left of the document you wish to download. Select the ‘More’ menu located on the right side of the screen (shown below) and click the download option.
This will initiate a new window in which the document will download to your device.
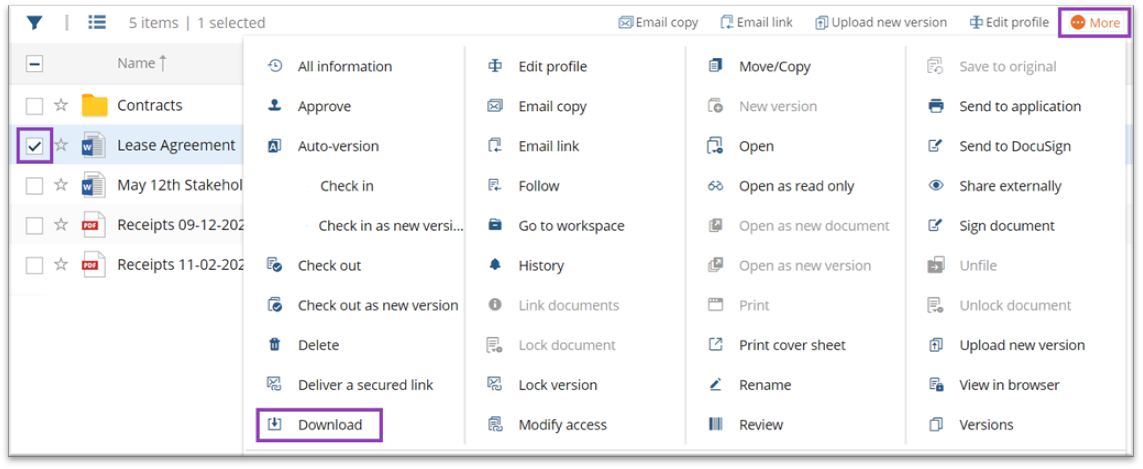
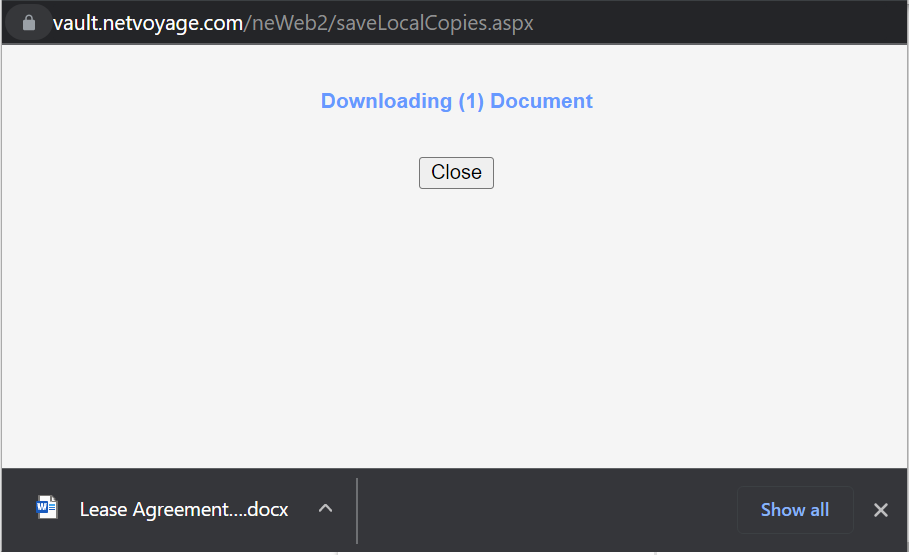
You may also select multiple checkboxes to download several documents at once.Doing so will instead download a ZIP file containing your selection.
If your legal team set up your CollabSpace to receive documents, you will have permissions to upload documents. To upload documents to a CollabSpace follow these steps:
-
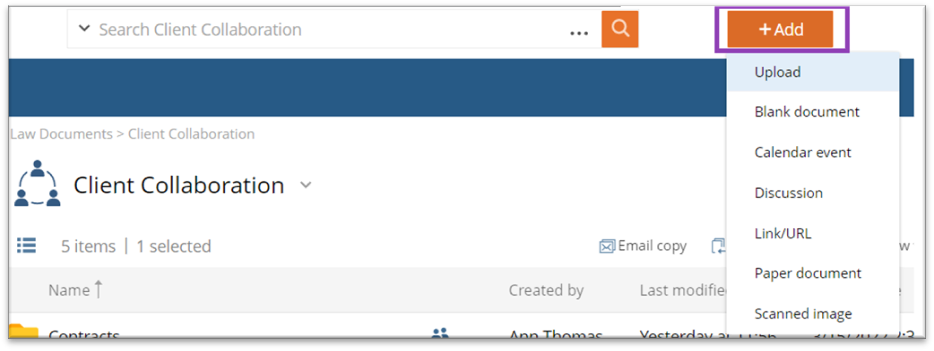
At the top of the CollabSpace page, you will see a button that reads ‘+Add’. Click that button and select ‘Upload’.
-
You will then be brought to the upload page, shown below. You may either drag and drop documents from your computer into the upload box or you can upload documents from your computer, highlighted below.
Selecting the ‘upload documents from your computer’ option will pop-up a dialog box where you may navigate to the location of your document(s) on your computer.
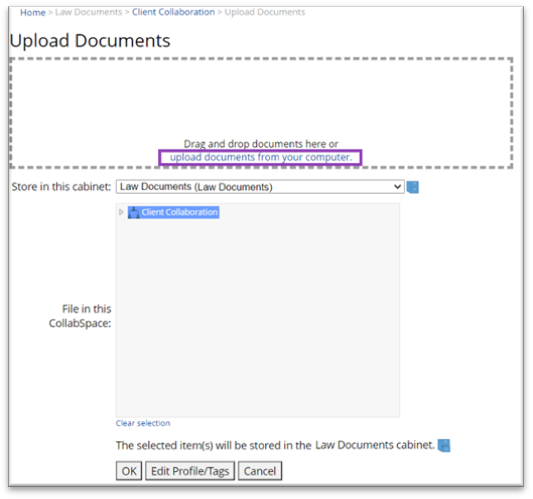
Once you have selected the document(s) you would like to upload, select the ‘OK’ button to proceed.
Your documents will begin to upload. You will see a screen that says Importing Documents.Do not close the browser while this screen is still loading.
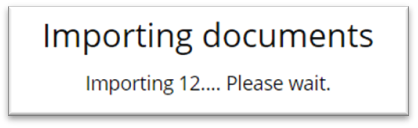
Once your documents have finished uploading, you will be brought back to the CollabSpace where you will see your newly uploaded documents. At this point, you may now close the browser or continue to navigate the CollabSpace.
Uploading your documents into folders and subfolders will help your legal team in accessing and profiling your documents.To create a folder in your CollabSpace:
Left-click on the name of the CollabSpace or desired parent folder.
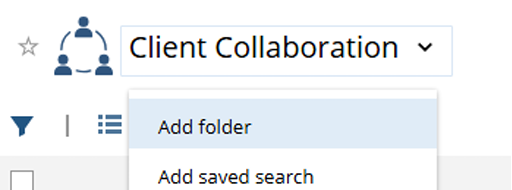
Click 'Add Folder and name your folder respective to its intended contents.
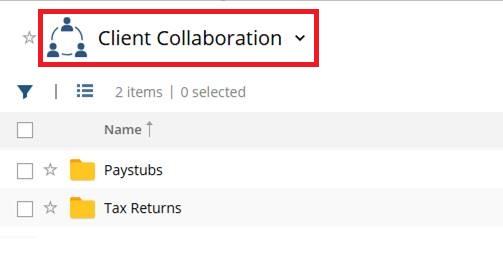
A dropdown should appear with further options.
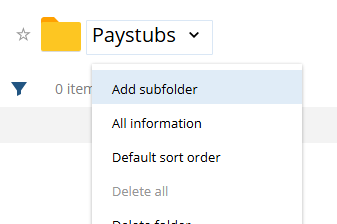
For subfolders, complete the steps above after you have clicked into a folder. Instead, the prompt should read 'Add subfolder.
Depending on the level of access you have been granted, you may edit documents within the CollabSpace. To edit a document, left-click the name of a document, and it will “check out” and download to your device. You will see a green checkmark next to the document name in the CollabSpace. This is to indicate that the document is checked out to you. Others may not edit this document while it is checked out to you.
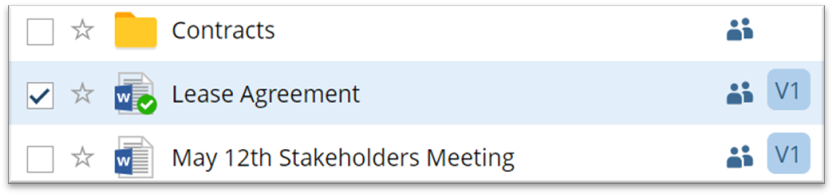
When the download has completed, open the document and make your desired edits. Once you are finished making edits, save the document to a location on your computer that you'll remember, and click the green checkmark shown in the screenshot above.
Upon clicking the green checkmark, a pop-up will appear with two options:
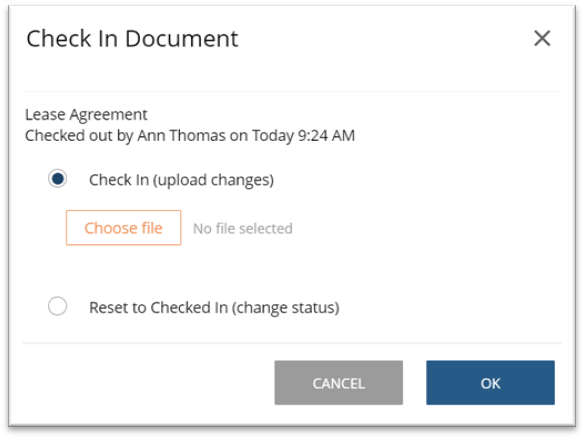
Select the 'Check In (upload changes)' option and click the 'Choose file' button. Browse to the location that you saved your file with your edits, select the file and click 'open'. Lastly, click 'OK' to save your changes. This will upload your document, with any changes made, to NetDocuments.
NOTE: If you checked out the document but did not make any changes, click the Reset to Checked In option which will simply check the document back in without uploading any changes.